Almost Human: How we Work (and Fight) with AI-generated Images
The latest AI image generators promise impressive results at the click of a button. But just how close are these tools to being production-ready?
It feels like not a day goes by without some minor improvement to the capabilities of generative AI. As tech enthusiasts, we enjoy testing the various AI tools available. This time, we decided to delve into the world of image generation for a quick field test.
Step 1: Picking the model
No, no, not that kind of model! I’m referring to an AI model, a “program” that has been trained on a set of data, which it will use to create an image for us.
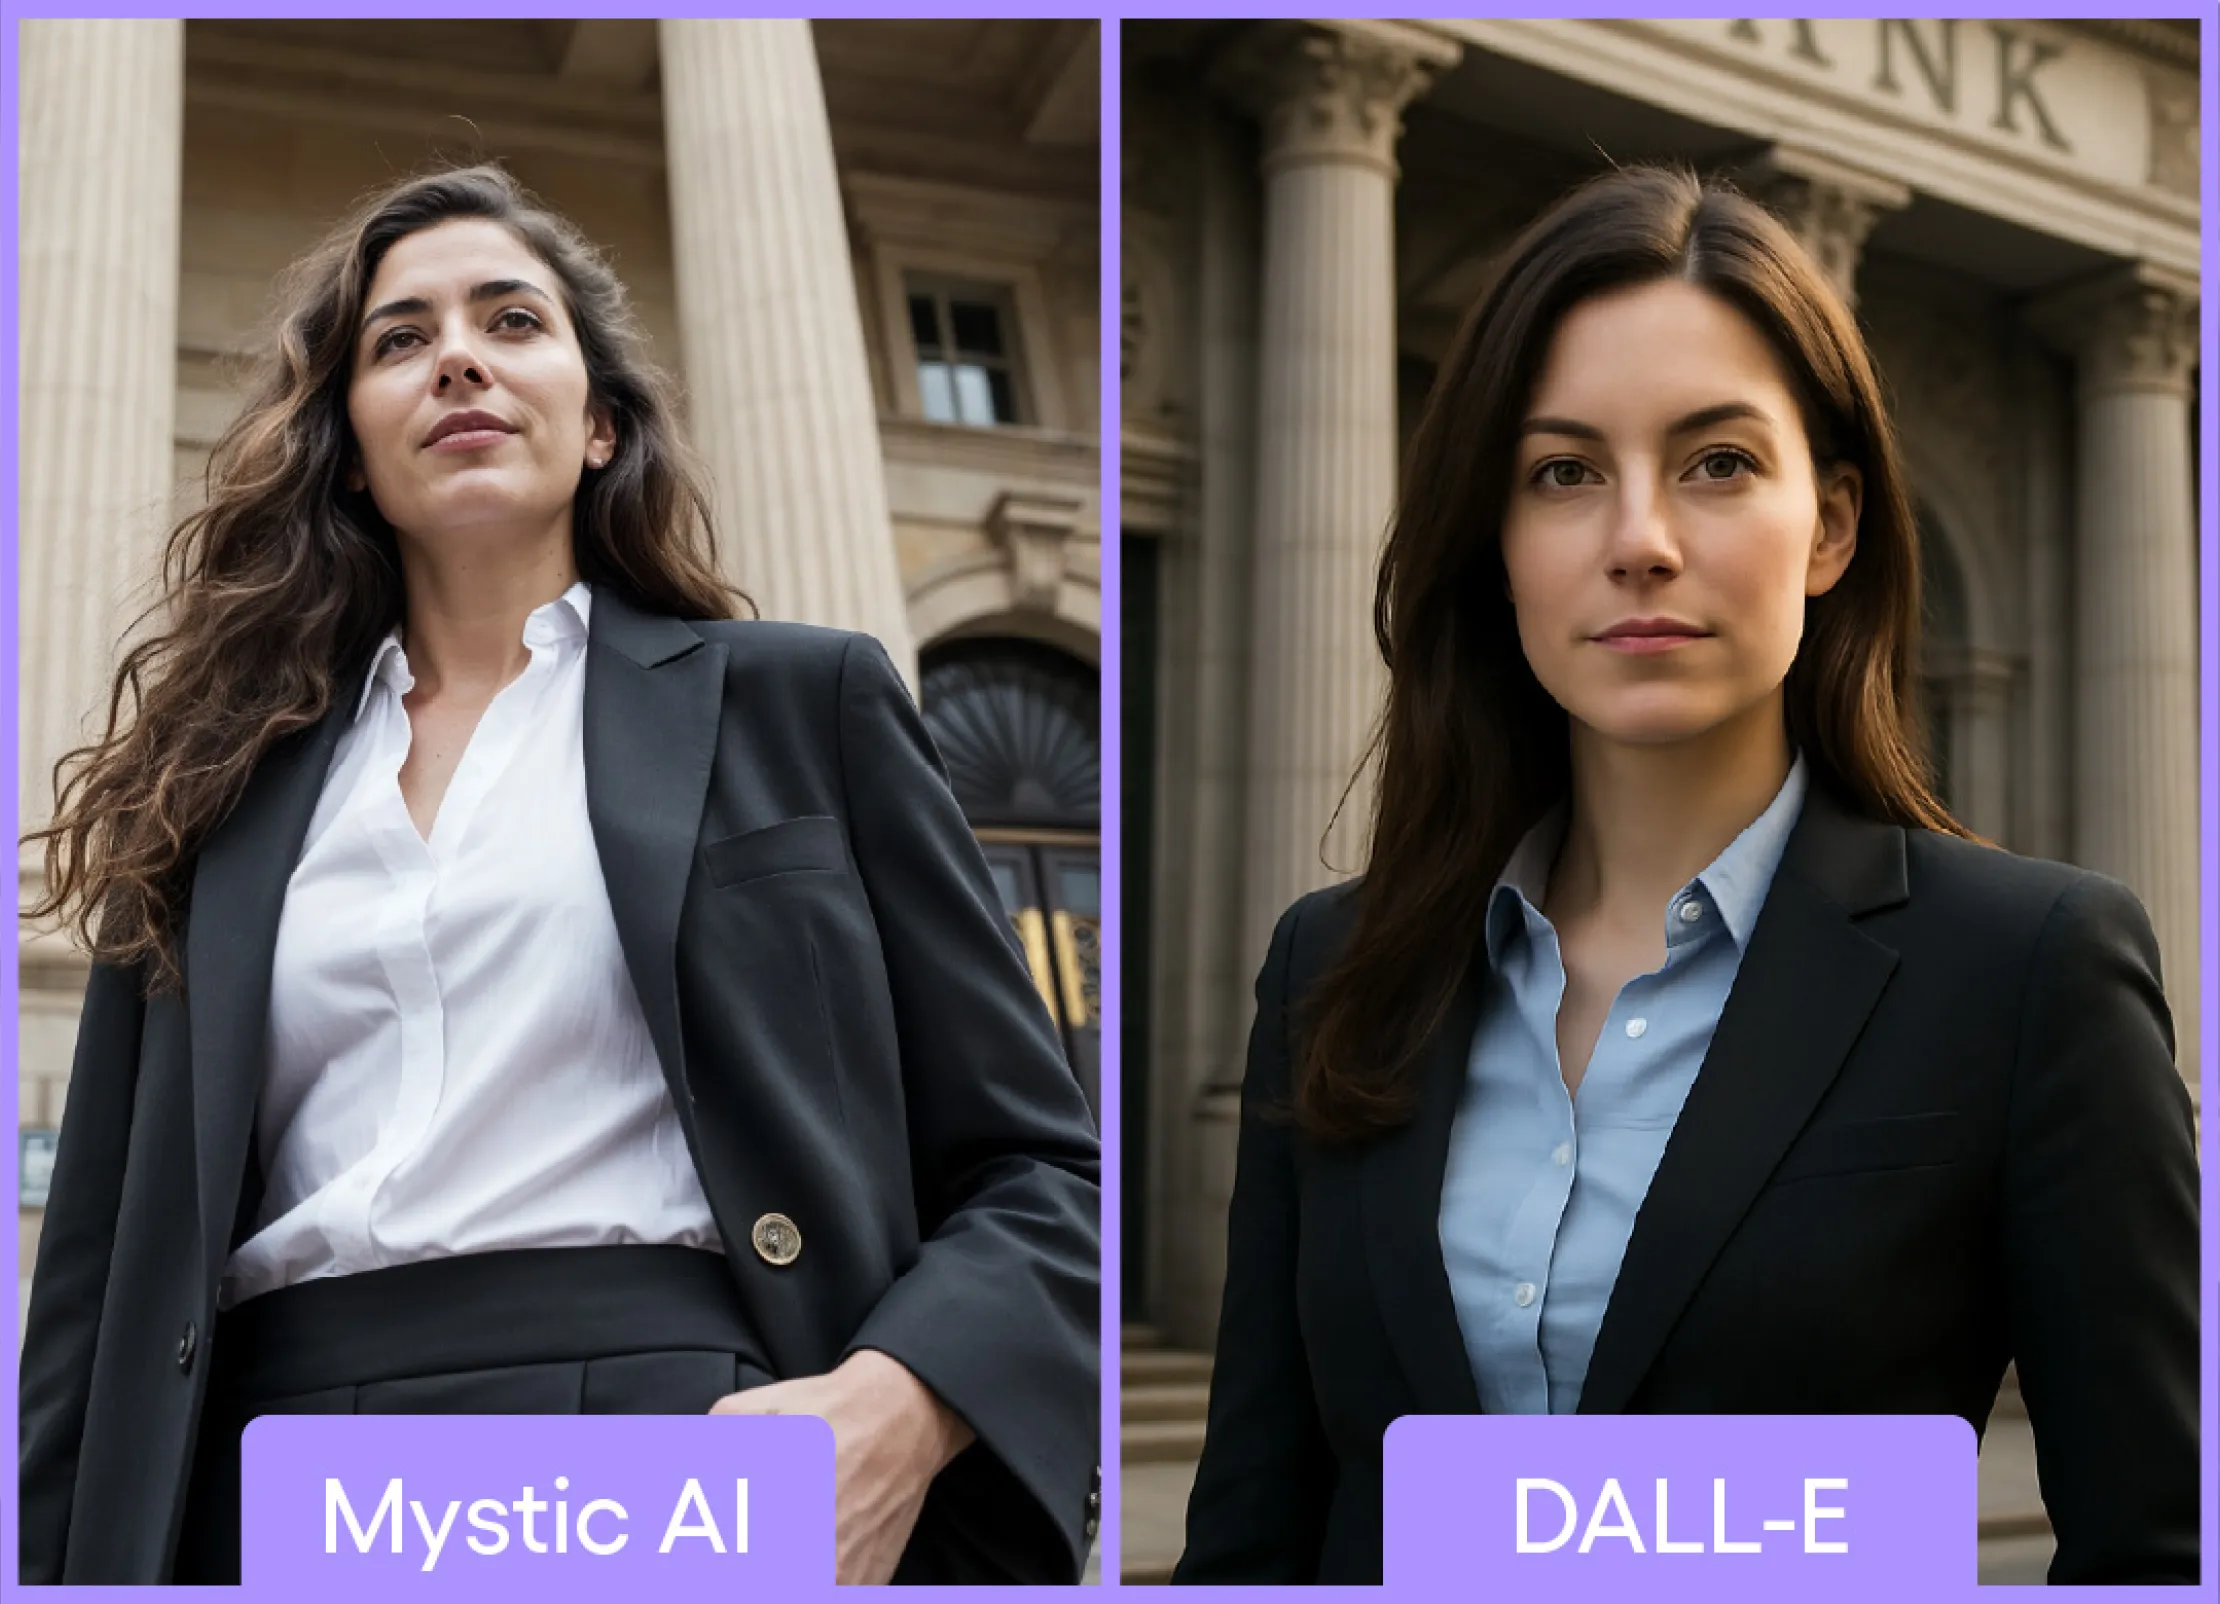
This may seem vague, and it doesn’t help that some models are named after the company that created them. The company Midjourney, for example, has models called Midjourney v3, Midjourney v4, Midjourney v5, Midjourney v6, and so on. A less confusing one is DALL-E, an image generation model created by OpenAI. The key takeaway: Each model has its own name. Cute and eerie. But what's the difference? Apart from the different user experience, different models are trained on different data sets. A model trained on art and illustrations like Midjourney will give better results in that area, while a model trained mostly on photographs, like FLUX.1, should be your pick if you need realistic, stock-like imagery that seems to have come straight from a camera.
Through quite a lot of research and testing, I landed on a model called Mystic, which is available with a Freepik subscription (and was originally created by a company called Magnific). As of the time of writing, it has the best “prompt adherence” (how well the generated image corresponds to the text you type) and the most photorealistic visual output that I have seen. And ultimately, it was realistic images that I was after in this test.
Step 2: Prompting
Prompting is the process of describing to the model, in words, the kind of image you would like to generate.
Communicating effectively with AI is a very important skill and will have a significant impact on the final result. The actual job title for this role has only emerged in the last two years: prompt engineer.
Prompts usually follow a formula; the one I found to be the most effective looked something like this:
[STYLE OF PHOTO] PHOTO OF A [SUBJECT], [IMPORTANT FEATURE], [MORE DETAILS], [POSE OR ACTION], [FRAMING], [SETTING/BACKGROUND], [LIGHTING], [CAMERA ANGLE], [CAMERA PROPERTIES]
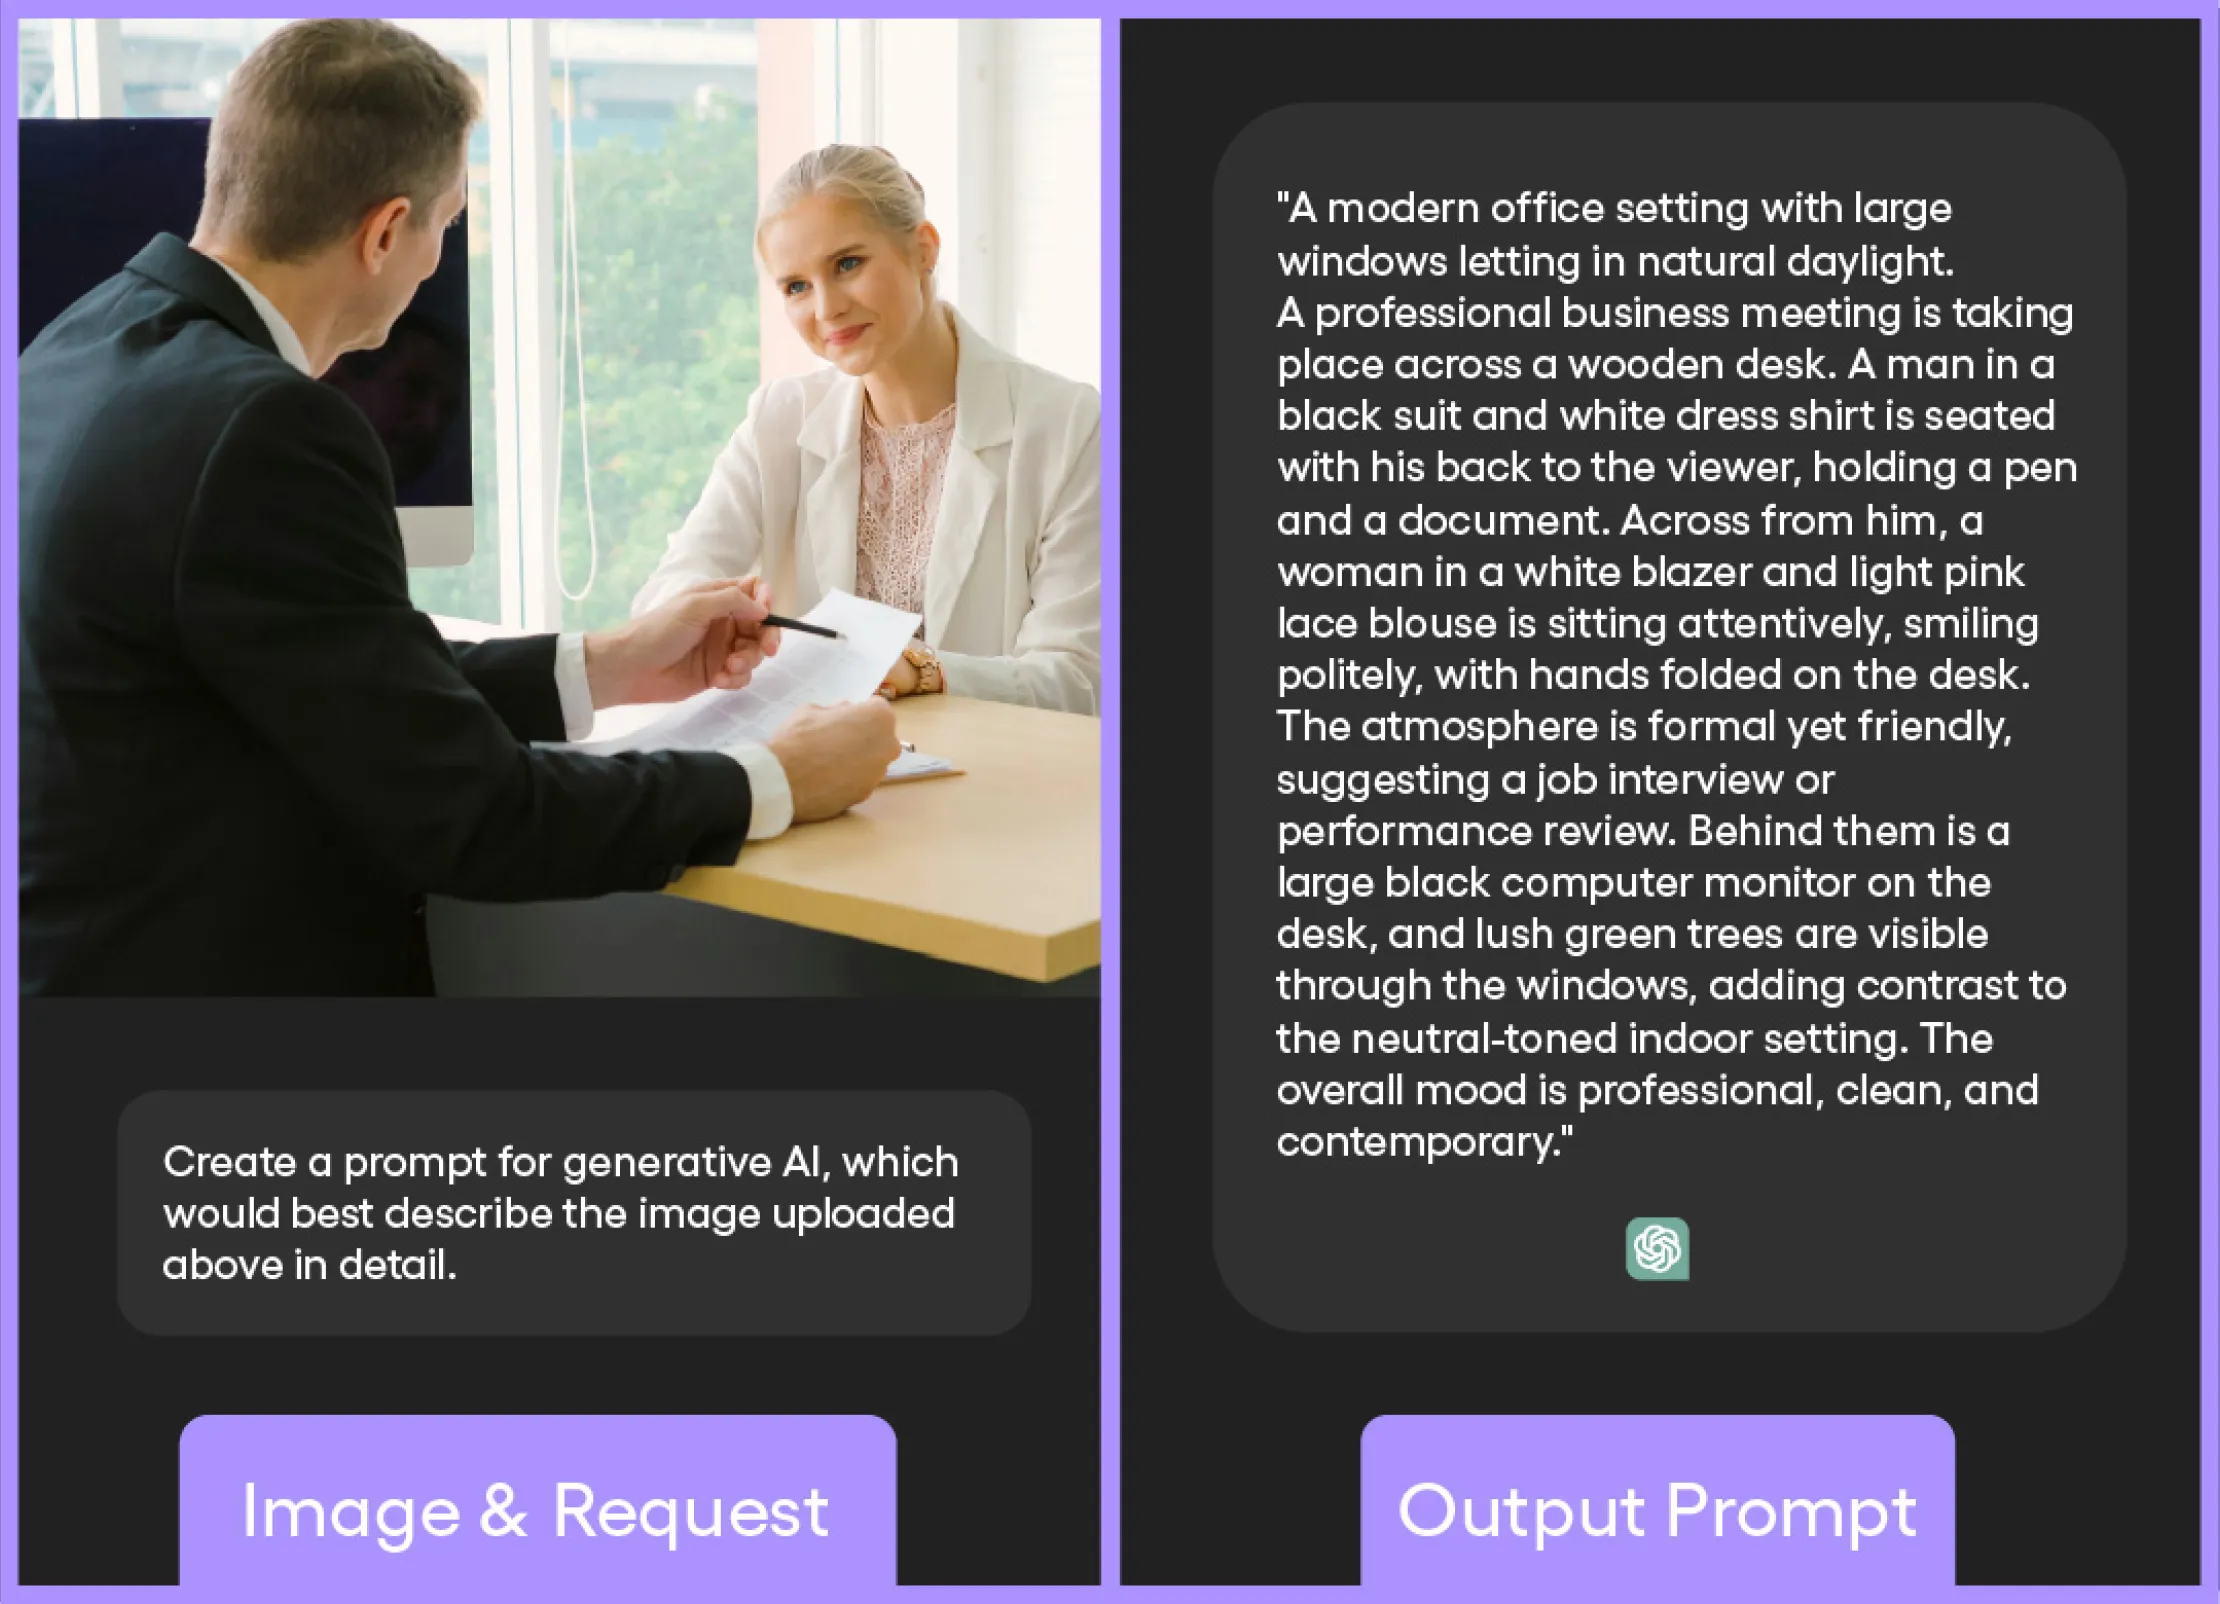
But after achieving various degrees of success using the formula above, I realised it would be smarter to ask experts how to create a prompt. And by experts, I of course mean ChatGPT! After all, who knows better than an AI how to describe an image to an AI?
It is also possible to reverse-engineer prompts by giving ChatGPT an image, which it will then describe using zeroes and ones. Don’t worry though –that part is invisible to us. Within nanoseconds, it is converted into text, which in turn can serve as the basis for a prompt.
Even when using this ChatGPT-enhanced prompt, the resulting photo won't be exactly the same as the reference image, but it's a great starting point.
Step 3: Generating images
Finally: This is the part of the process that truly requires the click of one button. Well, except when it requires multiple clicks. Some AI models allow you to choose the style, format, size and visual direction of the generated images. But alas, at least it’s only clicking!
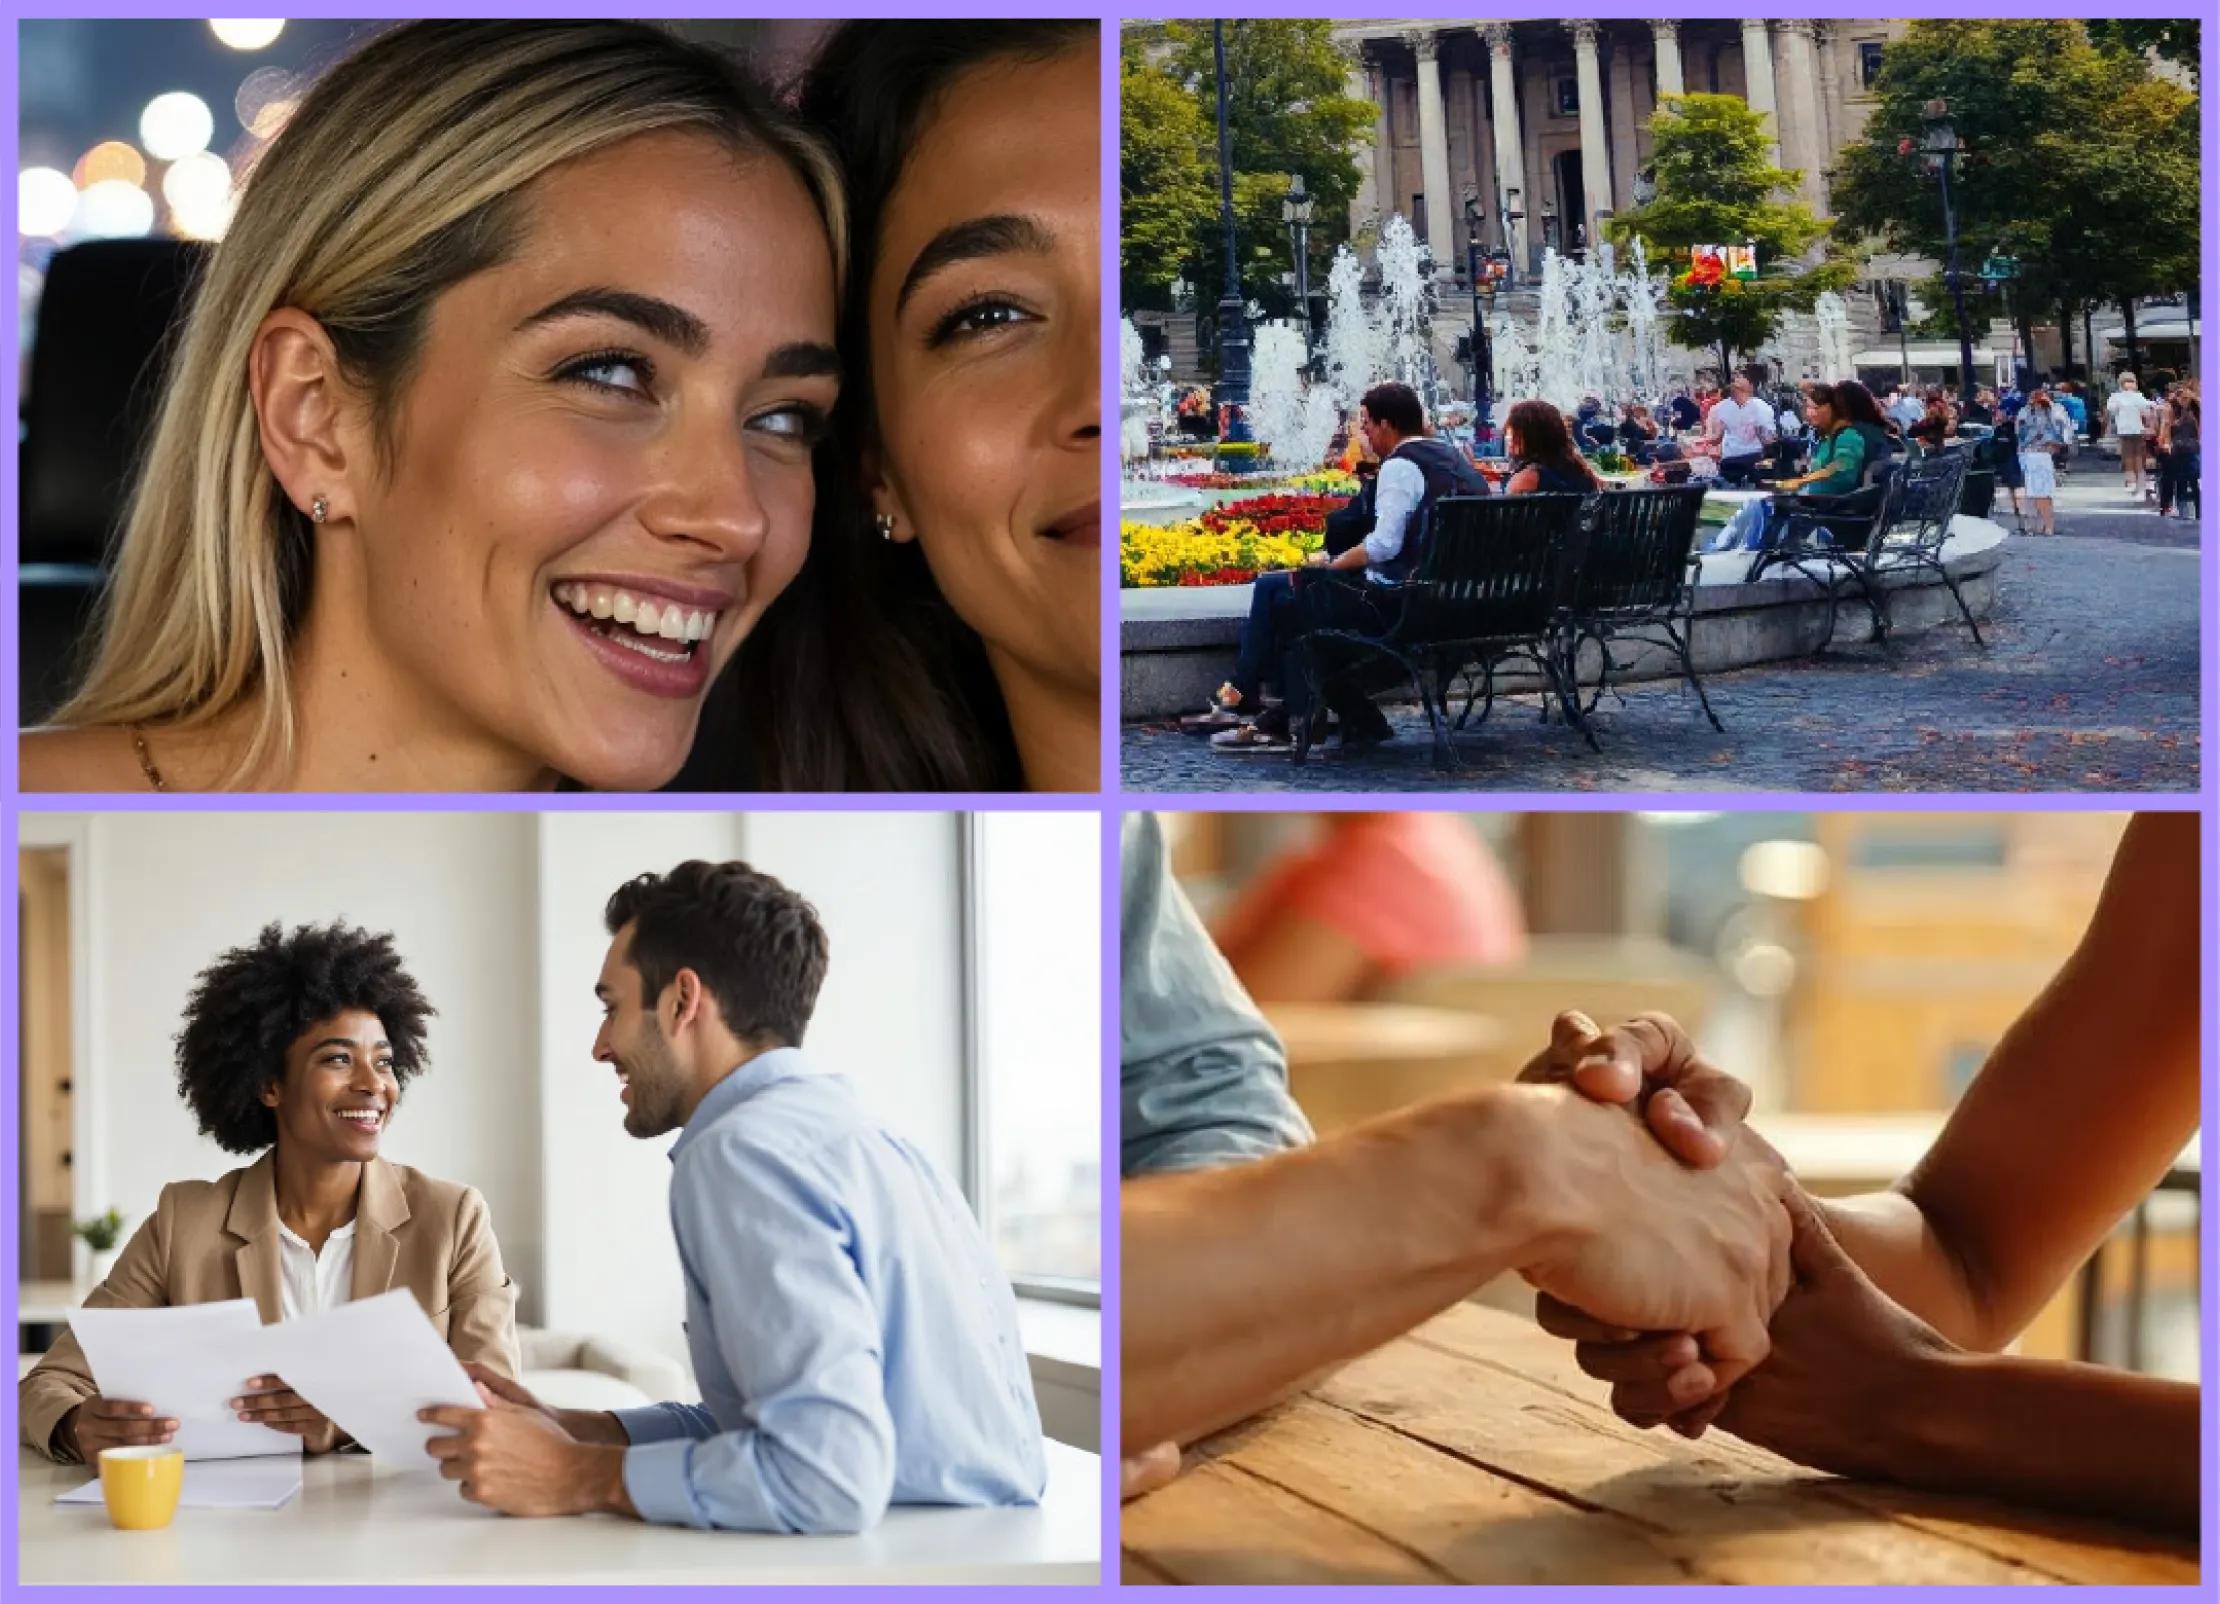
Our click-phoria doesn’t last long, however. We are soon faced with the painful reality of AI creating abominations that remind me of 80s stop-motion horror movies. As soon as humans are involved, it’s quite hard to get a result that doesn’t feature waaaay too many teeth, fingers, or what I like to call “demon eyes”. At least they can’t properly stare back, I guess.
On a more serious note, there are imperfections everywhere, even when it comes to objects or nature. It can easily take the generation of hundreds of images to get a single one that looks correct. Evaluating them also takes a long time. You finally create the perfect image, only to realize that the person has a tiny extra eyeball hiding in their curly hair. In this step, I highly recommend getting a friend to look at the image for a second opinion, as focusing on the details can make us miss the forest for the trees. Luckily, the next step is all about seeing the bigger picture.
Step 4: Upscaling
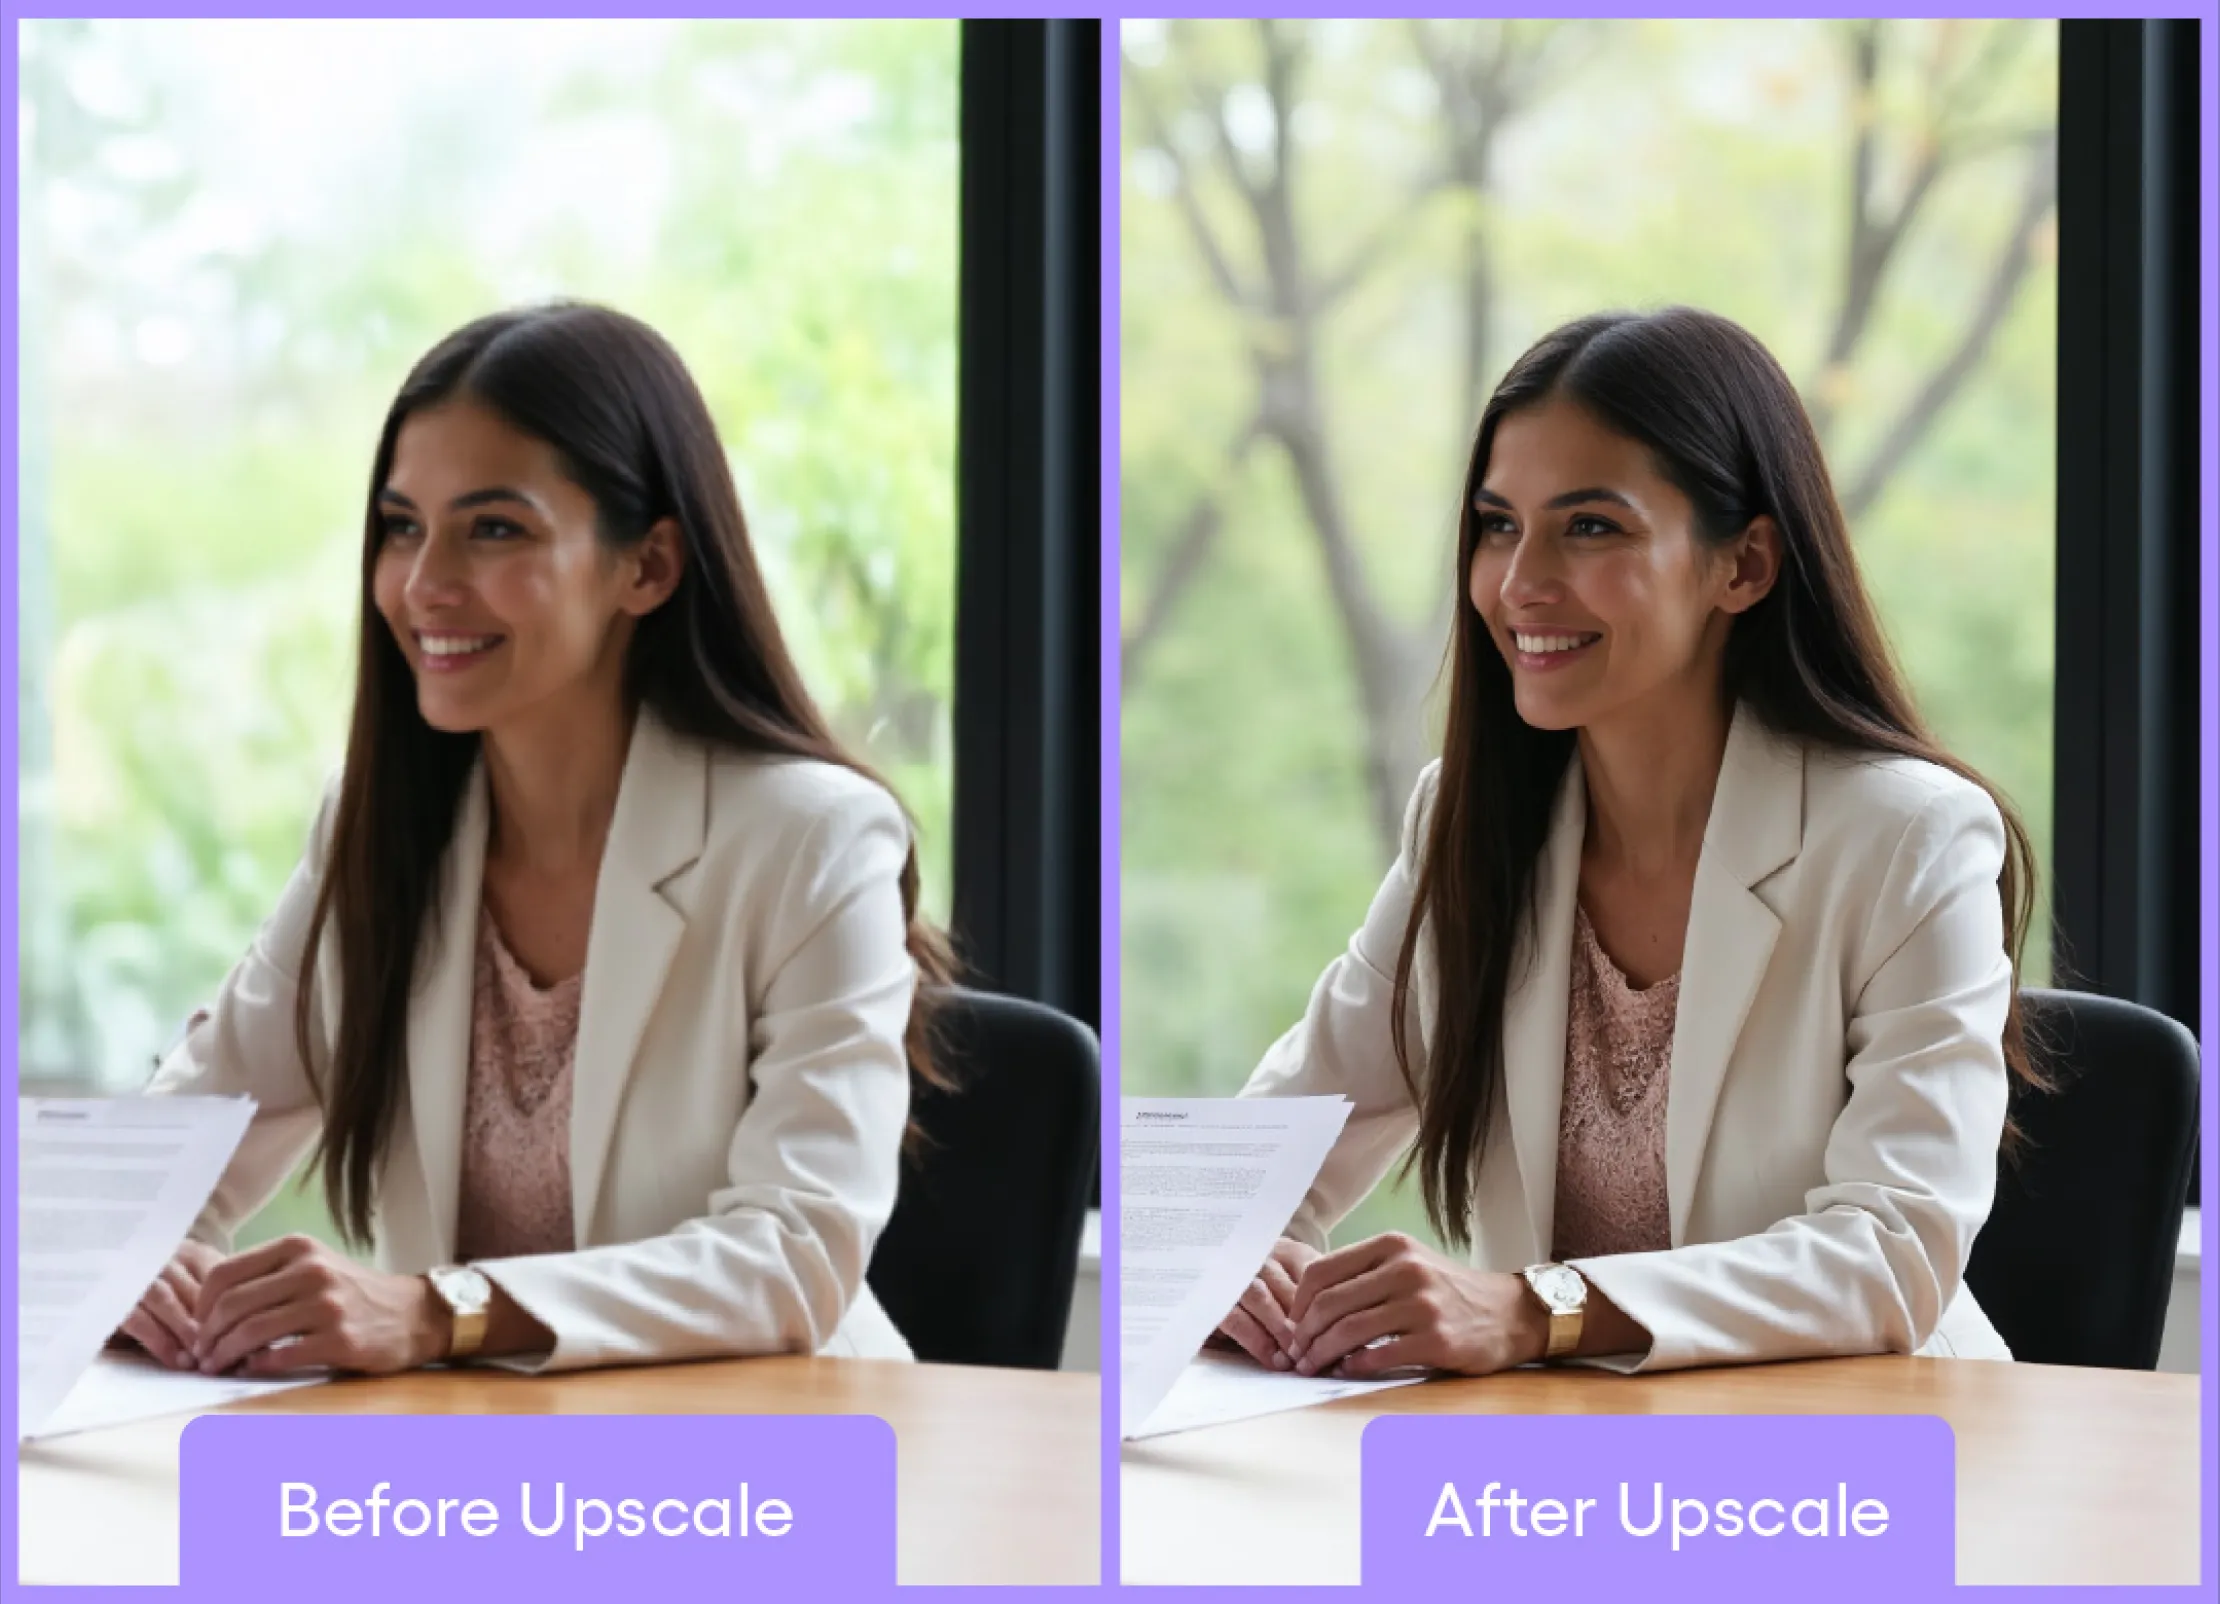
And I do mean that literally. The photos created by the AI are usually quite small. While one might get away with using them on a website, printing them would result in a low-resolution mess.
Luckily, there are tools called ‘upscalers’ that make images bigger by adding detail and pixels. How exactly they work is a bit of dark magic, but, as with all things to do with AI, they essentially just make the image bigger and then try to guess the content of the added pixels based on their training data. Upscalers, at their core, are models too, but they’re trained on super specific stuff, like images of hands or eyes, to infuse a bit more life into the image.
There are numerous upscalers on the market. Some are highly customizable and produce great results, but are slow. Others are very fast and intuitive, but might not always deliver your desired result on the first try. One of the easiest to use was Magnific AI – and it also provided decent results. Well, whenever it didn’t generate nightmare fuel by “hallucinating” (the official term for AI errors when generating images).
Step 5: A lot of Photoshop and InvokeAI
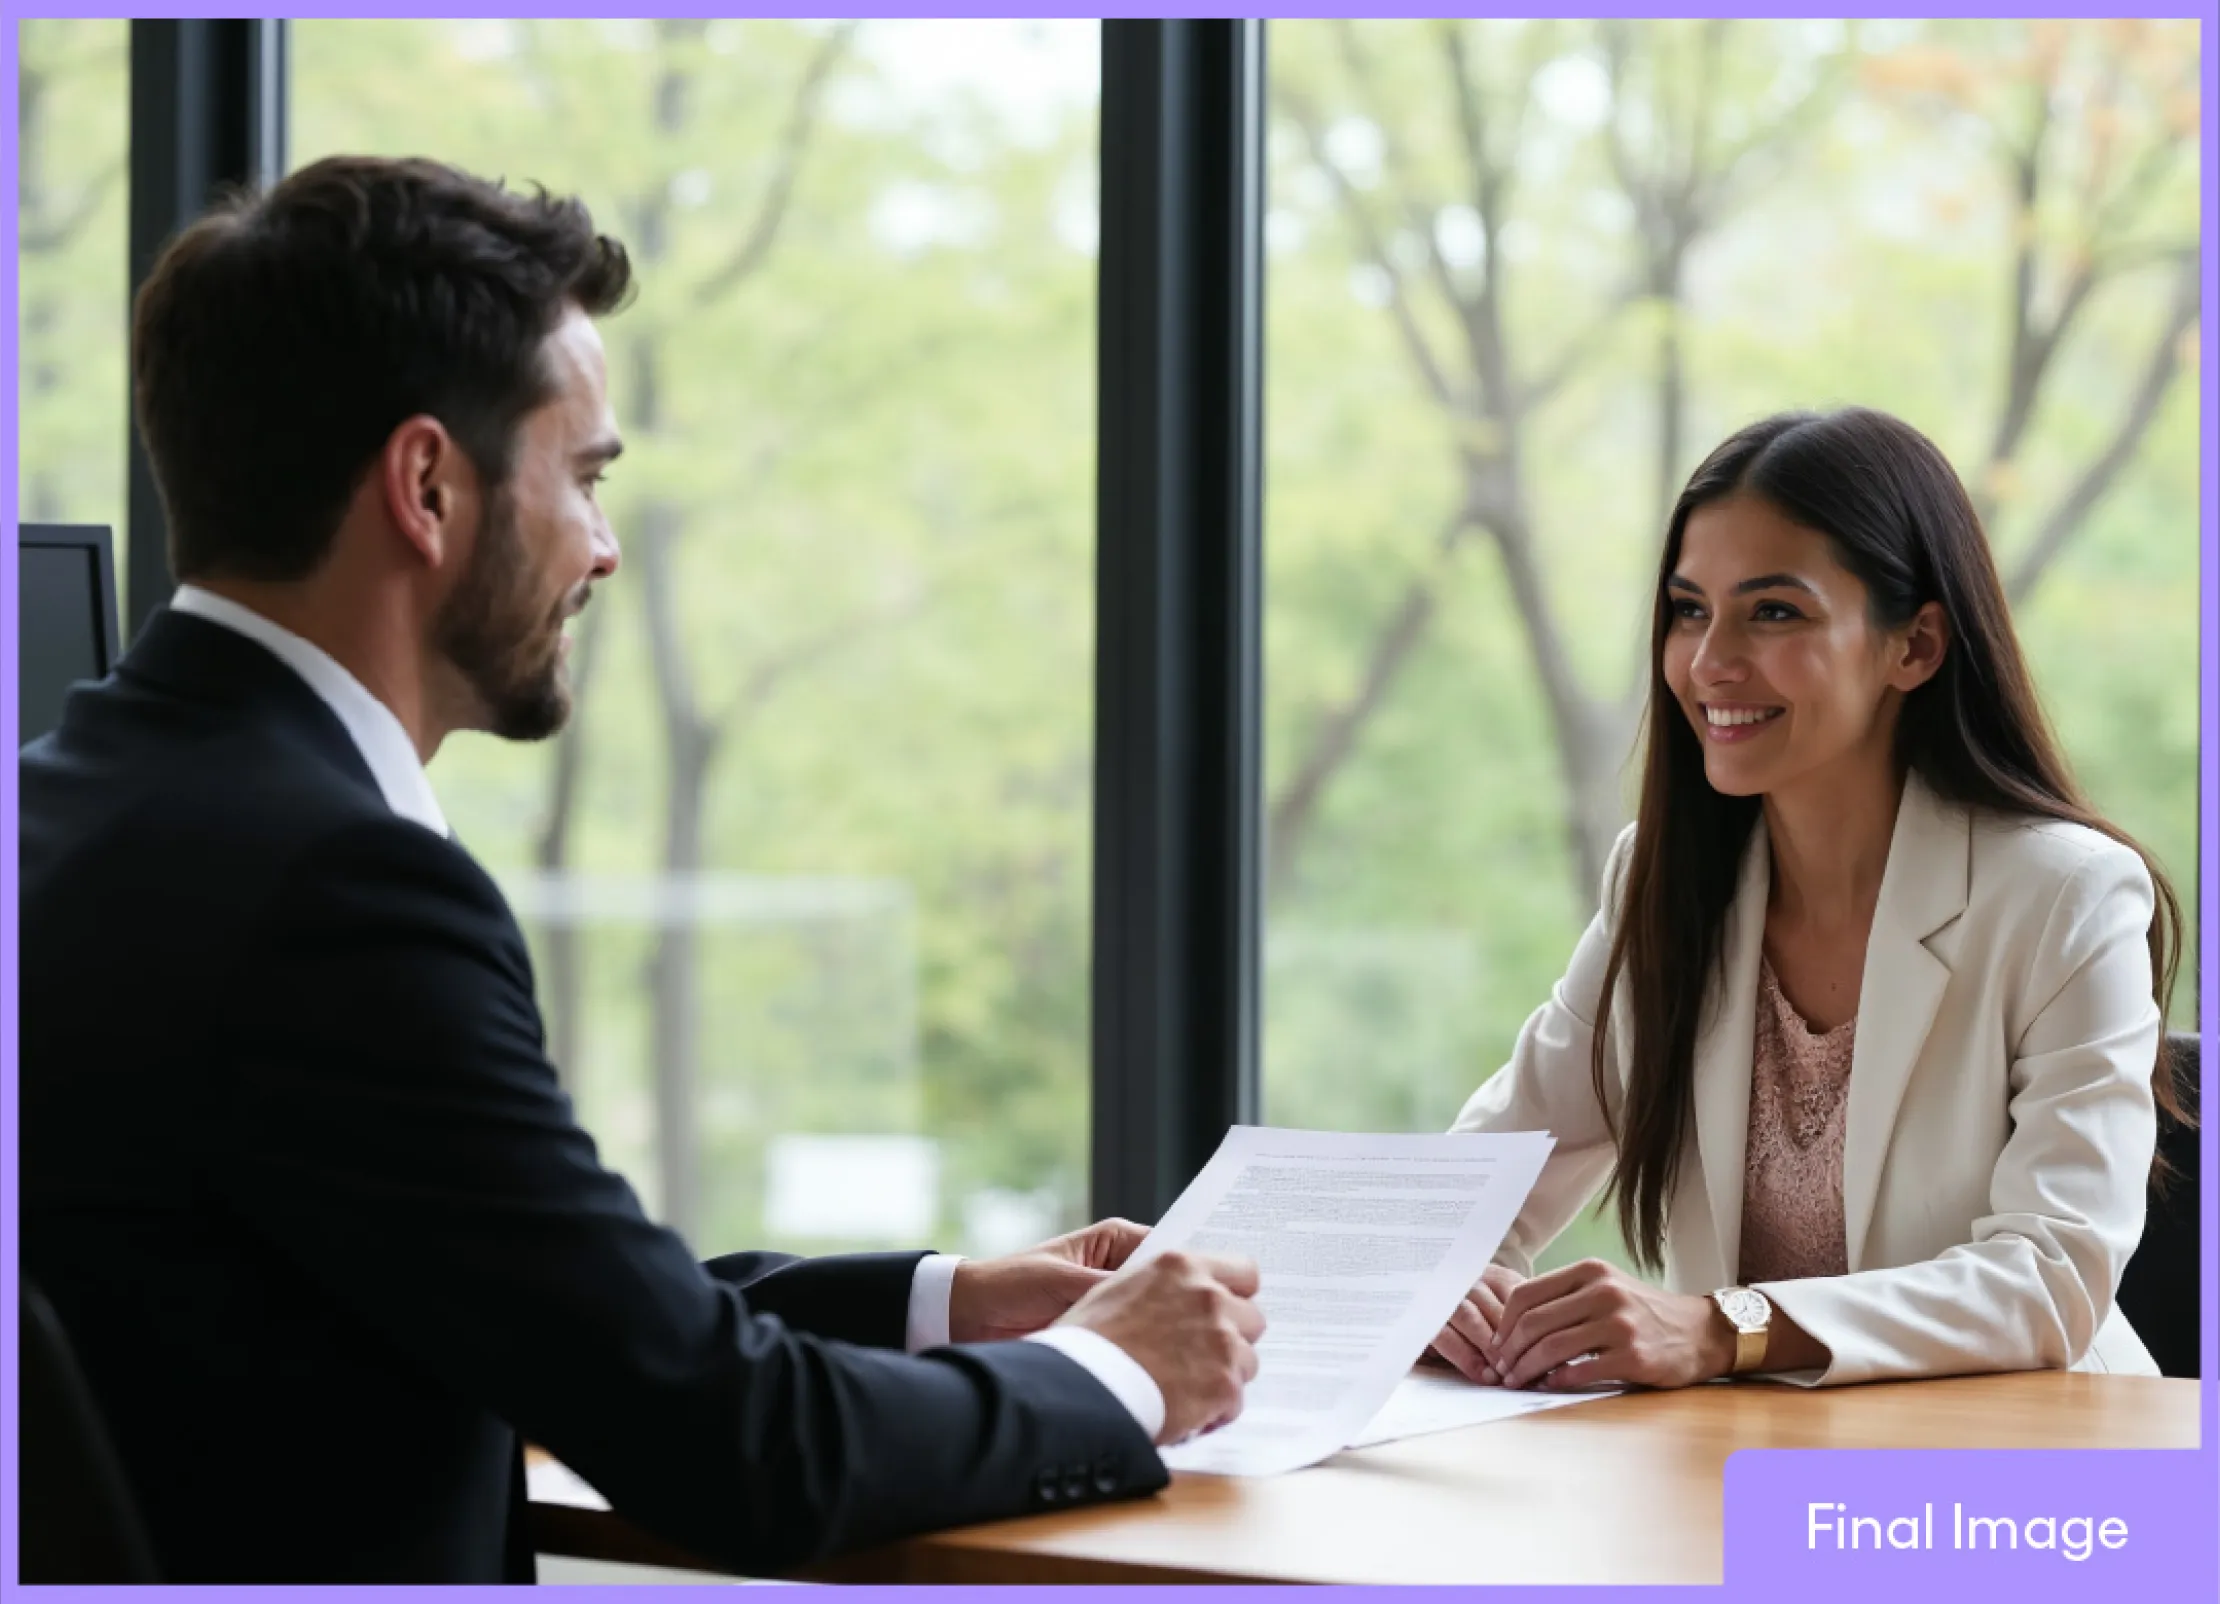
Even the best upscalers often generate additional mistakes in the process. The only real way to get a perfect image is, much to the joy of my creative peers, to use image editing software such as Photoshop, or its distant AI cousin, InvokeAI.
With these tools, we can remove unwanted objects, fix odd textures, remove extra appendages – and also color correct the photo, a process that all photographers need to go through.
Once we have applied these final touches to the image,voilà – we have a finished result. And it only took the click-of-a-button™.
Time for the debrief!
Despite it being a laborious process, I was genuinely surprised by the output. However, I have definitely proven to myself that creating a good generated image is neither quick nor easy. At least I’m happy to report that the field of photography has a long and happy future ahead.
Even creating a single image took multiple days of work, but there was another hidden cost that I haven’t mentioned yet. Aside from the fact that some of the AI models are trained on downright stolen content, which makes the morality and copyright status of the generated image very questionable, there is also the issue of the power and resources that these generative AI tools use.
Although recent testing has shown that ChatGPT is much more efficient than we initially assumed, it still uses 0.3 watt-hours per query. This is equivalent to running a LED lightbulb for 20 minutes or using your smartphone for 15 minutes.
This may seem insignificant at first, but keep in mind that this is the amount of power required to receive a single response from ChatGPT. If we take into account that we send requests to ChatGPT multiple times a day, and an inquiry often consists of several questions, it quickly adds up. Not to mention that generating images and videos is exponentially more power-hungry than receiving a simple text answer – though it is not entirely clear by how much (estimates range between 10 and 100 times more).
The verdict
While generative AI can be useful and is slowly becoming more mainstream in our industry, these tools are far from the all-solving solution that some would have you believe. Even once AI has improved to the point where it can create truly meaningful, attention-grabbing content, I believe there will always be a need for a human pilot (that sounds much cooler than ‘prompt engineer’, doesn’t it?).
Art also likes to be rebellious, so I imagine future artists will find ingenious ways to infuse their work with a human component, whatever that may look like. Reaching this conclusion puts my mind at ease for the next few years, as I’m not overly worried about being replaced by an AI. I just hope it’ll still be a while before we see the birth of cyborgs.